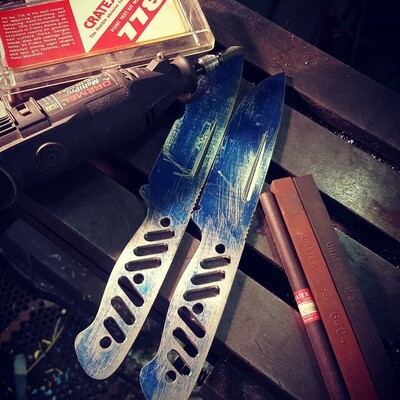
Loving me some @cratexsandiego today a tool maker can't live without this stuff.
Free UPS Ground shipping on all online orders over $149
Welcome to another addition of CRATEX metalsmith chapters. In this chapter, we’ll talk about knives, blades, knifemakers, knifemaking tools, CRATEX abrasives used for cleaning, polishing and finishing blades. As always, we prepared an interview with an expert in this field. This time we had an opportunity to speak with Kris Stevens from KS Bladeworks. At the end we’ll help you to make your first camper knife with few DIY tutorials.
Before we jump to files, hummers, abrasives, forging and grinding will introduce the most used steel for making blades. After all, steel is the essence of every knife and thus can’t be avoided in this chapter.
If you would like us to explore and cover some other topics related to making knives feel free to contact our team at social(at)cratex(dot)com.
To quickly jump to the desired chapter, click on chapter icon.
People & Knives
Knifemaking Tools
CRATEX Tools For Knife Making

Interview With Kris Stevens Custom Knife Maker
How to Make a Knife
Best Steel For Knives
How to Remove Rust from Knives
Knife Blade Design
Knife Patterns and Templates
How to Make a Knife Handle
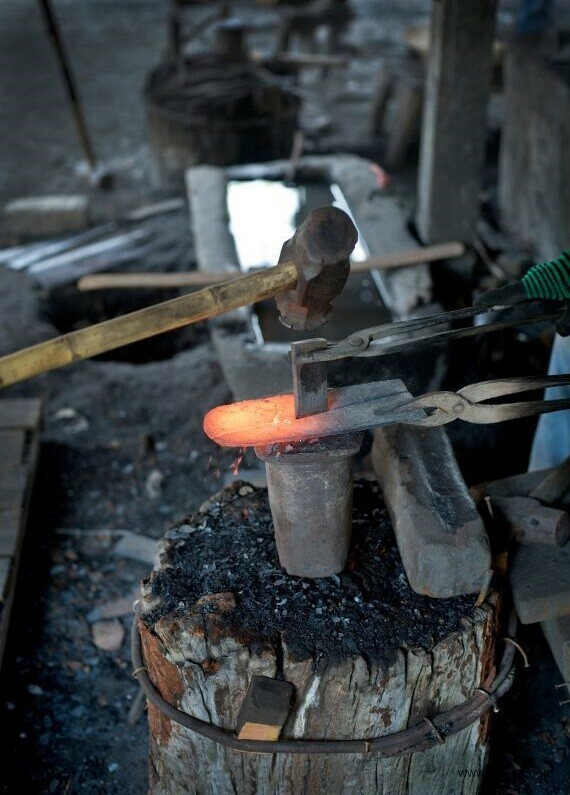
We use knives every day, at least in the kitchen, but how many times have you asked yourself if it was possible for people of early civilizations to survive without a knife. Today we use all kinds of knives - paper knives, pocket knives, bread knives, camper and hunting knives, etc. However, a knife made of flint provided food and was a tool for making shelter in the Stone Age. Some say that the invention of the wheel was the most important invention in history, but how did they manage to build the wheel without a cutting tool? The knife was the first handmaking tool that we used to manipulate the world around us.
People used different materials for making knives. At the beginning, it was flint, copper, bronze, iron and, finally, steel. Techniques for making knives also evolved along with the new tools used for knifemaking.
We still have knives with fixed blades and folding knives as before. So, what has changed the most over the years? The material is what changed the most! These days we use sophisticated materials for knife making, like stainless steel, titanium, carbon or ceramics.
Centuries after, a knife is more than just a weapon for hunting animals and plant cultivation. Knife found its way to our tables, we use them daily. Knifemaking became a true art. Knife customization, engraving and adding gemstones is not so rare anymore.
Knifemakers are custom knife manufacturers. Some call them bladesmiths. They build knives out of blade material, usually from steel. This is done by forging. Blade material is heated over high temperature and then shaped with a hammer. After shaping comes grinding, polishing and other blade finishing processes. When the blade is done, it is time to make handles. They are usually made of wood, leather, ivory, micarta, stone etc. which is a harder way to make knives. Hobby knife makers and enthusiasts rarely do forging - instead, they do a stock removal. Below is just a baseline that will give you a clue on how to make a knife.
Making a knife demands design, adequate materials, and the right equipment. The proper tools will contribute to creating a durable handle and blade. It can be made at a small warehouse are at home with homemade or heavy equipment.
We have made a list of the top 13 tools that you need for knifemaking and a description of what they're used for.
The knives are sharp. Use heavy working gloves to protect the hands from getting cut or burnt. Wear the safety glasses to guard the eyes against steel dust and debris. Also, use a dust respirator that will keep you from inhaling harmful steel dust into the lungs. Plus, a work apron will protect the skin and clothes from being damaged by a tool.
They’re used to sand off any rough surfaces of metal once you’re done shaping it.
A bench vise works as a third hand to hold the material that you're working on a place where you form it. The vise’s mouth faces upwards so that it’ll hold the blade up in the air, where it’s easy to get to.
Like a bench vise, clamps are employed to hold your knife in place while you utilize it. The difference with clamps is that the blade is held out to the side, rather than up in the air.
The hacksaw is used to grind away steel to make the sharp side of the knife.
Rubber abrasive wheels, cones, points, and sticks all come handy when it comes to finishing work - blade fine grinding and polishing. A lineup of CRATEX rubber abrasives is imperative for knifemakers that want to add a final touch to their piece of art.
You'll need a variety of sandpapers' grits to shape the handle and to get the knife smooth, so that is comfy in hand.
The knife is held together with the pins. The drill press is used to drill the correct size of the hole for the bolts to fit securely inside.
Dremel isn’t an essential tool but can be handy for cutting material, detail grinding, rust cleaning, jeweling, or customizing with mounted abrasive cones, small rubber or cut-off wheels, points and bits.
A forge is used to heat the steel so you can shape the knife the way you need it.
Angle grinder with right abrasive wheel is used to grind away the sharp side of the knife.
Reliable and heavy-duty belt grinders are a must in the artistic planet of knife making. Having a high-quality belt grinder for consistent output is the difference between a trash knife and a beautiful one.
The ideal belt grinder will also serve for sharpening other things, like axes, circular saw blades, and gardening trowels.
They are the best way to sharpen the knife once you have it made. There is variety of designs, grit ranges, and materials. Choose according to needs and knife material.
CRATEX is the leading US manufacturer of rubber abrasives. Many products from CRATEX assortment found use in knifemaking. Rubber abrasive wheels, cones and points are an inevitable part of knifemaking supplies. Rubber abrasives are especially convenient in the finishing process: for fine grinding and blade polishing, although many knife makers use them for handle finishing as well.
CRATEX abrasives are capable of: removing rust from old blades, initial blade deburring, removing scratches on blades, cleaning up and smoothing solder joints between guard and blade, cleaning plunge lines, blade polishing, knife engine turning – jeweling, all kinds of blade smoothing and rounding, blade mirror polishing, etc.
When it comes to grit texture, all CRATEX rubber abrasives are divided into 4 groups:
For polishing knife's hard-to-reach areas, you’ll need CRATEX points. Choose between three shapes depending on your work scope: bullet point, cylinder and tapered.
If you have a blade with grooves that need to be polished, or guard corners that must be smoothen, spirals on handles that need micro-deburring, look no further! CRATEX rubber points will get into places the sandpaper can’t. CRATEX Points are real time-savers for many knifemakers.
Depending on a blade size, choose a pin length and a diameter. Attach them to your favorite power tool, Dremel, CRATEX Rotary tool or a Foredom and get into every groove. Pins are flexible and can be re-shaped to suit the needs, so you can polish the file work on a knife blade in a few minutes. Depending on the shape, length, diameter and arbor hole, there are eight pin combinations. Along with the polishing point, you can order rotary tool mandrels in two dimensions. Get full info and order polishing points here.
CRATEX rubber polishers are imbedded with the silicon carbide, so they won’t heat up the steel, and you won't need to use anything to cool it down while working. Use them dry and forget about tripoli and rouge.
Same as polishing points, small CRATEX wheels can be mounted on your rotary tool and used to cut and blend scratches, all in one operation. Small wheels are produced in 4 grit textures: coarse, medium, fine and extra fine. You can choose between two edge shapes: tapered and straight. Size from 3/8" to 1" and special cushioning can guarantee a smooth and soft metal removal without the loss of dimensional tolerances. Depending on the diameter, edge shape and thickness, you can order more than 10 wheels variations.
They offer a superior control over the knife blade and will ease your job when polishing knife edges and flat surfaces. Small rubber wheels are used by many knife makers since they are softer than other types of bonded abrasives. This means that even hobby knife makers can use them without the fear of grinding too much of the knife material.
Visit this page and see small wheels detailed specification.
For removing and leaning corrosion from long and tick blades, removing heat-treating marks on blades, smoothing swords edges, blade restoration, fine grinding after stock removal or sharpening other knifemaking tools in your shop, there are CRATEX large wheels.
They can be used on all conventional electric motors and bench grinders. Large wheels come in 1"-1/2", 2", 3", 5" and 6" size depending on the thickness and arbor hole. All CRATEX grits are available.
To check the prices and detailed specifications, visit Large Wheel page.
The easiest way to make your knife unique and is to add fine patterns to a knife steel. Knife engine turning has been one of the favorite decoration technique for centuries. CRATEX polishing rods are the perfect solution for knife engine turning if you have a small drill mill. To learn more about length and cross-section on this link.
Watch the video below to see CRATEX polishing sticks in action. Video credit: @glennarehovinknives
Our guest is the custom knife maker - Kris Stevens from KS Bladeworks. We asked him 19 questions and this is what he told us. Enjoy this wonderful interview. If you want to find out more about Kris visit KS Bladework Instagram or YouTube Channel.
Welcome, Kris! And thanks for accepting to do interview with us. Could you please tell us a bit about yourself? How long have you been working as knifemaker? Can you let us know about your beginnings and KSBladeworks?
- I was born in Denver Co. and was moved out to San Diego Ca. in 1976 when I was a bit over a year old. Graduated from Valhalla High School in 1993. I have always loved knives and up until 2014 just thought it was just brands like Kershaw and Buck and such.
Now, How I got into making is a fun story in itself. Back in about 2007 or so my fiancé and I used to watch a lot of shopping network shows and one that we always made a point to watch was watches and Jim Skelton. So, every Sunday we would watch him showcase watches and became somewhat of a collector. Then one-day Jim said that he was moving on to something different and he was gone. A few years later I stumbled across his YouTube channel and found he was now reviewing top end knives so of course I was interested. After watching his reviews, I would read some comments and start to follow some of the makers.
Gavko and Jesse Jarosz really got me to want to make a blade. So, one Saturday (March 2014) I bought a CHEEP Harbor Freight 4-36 grinder, went to Home Depot and grabbed a piece of oak and a bar of carbon steel and made my first fixed blade Even though I couldn’t heat treat it HA-HA. THEN I found Instagram after Jim, Mikel and Jesse were talking about it on YT and created an account and posted it. For the longest time I had less than 100 followers. That was until I figured out what hashtags were! I got into making knives wanting to make a folding knife (frame lock). That is where it started. I posted the builds and not just finished products. And people loved that. Not just a pretty piece but the process of what it takes to get to a pretty piece!
Then the orders started, and it scared me a bit. So, I started making customs from a sketch that I would send to a customer and update throughout the entire process. Had to close my books and now I only make when I like to and post for sale. I never went full time even though people asked ma all the time when I was. This is my hobby, I felt/feel that if I went full time it would feel like work and I would lose the enjoyment. I have a 6-5 job and this hobby is relaxing to me.
Can you describe your day on the job as a knife maker? Or your typical work week if more suitable?
- Like I said above, this is a hobby for me, I build when I like. Sometimes I get so far in the Zone that I’d be up until 2-3 AM and then go back to the day job at 6 am. My shop is at home, so I could be watching TV and get an idea and BOOM! OUT TO THE SHOP! Weekends for me are for knife making mostly. I draw out my design and research to ensure that I’m not copying someone’s design and then lay out my materials. Choose my blade stock, handle materials, pivots and hardware and get to cutting. Then I got my mill. This just made thing SO much better and tolerances where I wanted them. Also got into making titanium tings and other goodies. I would have a piece of scrap left over from making a knife and make a ring and post it. Then I would get orders for those.
What's the last knife making project that you did that was especially challenging?
- My favorite knife I did (And totally jumped into that way early in making) was a Damascus/titanium liner lock, 34 individual hand-made pieces that had to fit together perfectly so it would work. I did a final assembly video on my YouTube channel. Everyone loved that knife. (Actually have another one in the works now).
Do you make knifes by stock removal or forging? How do you choose steel for new project?
- I use the stock removal method. I get asked if I will ever forge a knife. I really don’t think I will at this point. Maybe when I retire. For steels I generally use AEB-L stainless steel or carbon Damascus. In choosing, I see what makers are using and how steels work and heat treat.
You make folding knives as well. Are they harder to make then knives with fixed blade? Why?
- I do. Folding knives are much harder to make than fixed blades, not knocking fixed blades in any way but they weren’t challenging enough for me. And there are a ton of fixed makers that build an awesome fixed blade! Reasons why a folder is more difficult to make is… Everything has to be precise, square and centered for it to function correctly. This comes down to good tooling, materials and finishing. I started with cheap tools abrasives and fought builds all the time trying to get them to work. Once I stepped up the tool game it was like day and night (Talking about minimizing process times with quality belts and good drill bits and endmills. Everything just started to fall together and it became easy to make a folding knife for me.
What is single the most important step when making a knife?
- Do your homework! Watch and follow makers that post builds and videos to see how things are done. Be able to vision what you want the finished product to be.
Do you find anything annoying or do you hate something in knifemaking?
- Not at all. Well I shouldn’t say that. Don’t bite off more than you can chew… I took on a large run of micro frame lock folders too early in the game and it almost turned me away from making completely.
What tools are essential in your shop? Belt grinder, heat-treating oven, etc.?
- This is a deep question. But the most important for most is a good grinder. Be it a 2-72 or a 1-30, Everyone has their own niche and work with what is comfortable for them. A good sturdy drill-press and quality bits. And yes, a heat treat oven for me. Most send their blades out for heat treat and that is great but for one-off’s, I keep it all in-house. I LOVE my mill and lathe. I can make parts that I no longer need to search for and buy.
What are the most important factors to become a successful knifemaker? Do you have any advice for those who just started as knifemakers and want to achieve great career in this field?
- I would say stay humble and do what you love. There are a lot of great makers that would offer to call and talk to a new maker and give advice. I have done that several times and makes the knife community that much tighter and builds great friendships. Don’t go into a build thinking it’s crap! Everyone starts somewhere, and this is just the beginning. Take criticism with a grain of salt. Make what you like and build from there. You will always improve with practice.
What type of abrasives except sending belts for belt grinder you use in your shop: rubber wheels, points, cones, etc.? Please describe purpose of use: blade or handles polishing, blade grinding, finishing, cutting metal, blade mirror polishing, etc. Why do you need abrasives and in what phases do you use them?
- Not a whole lot actually. I use my belts for almost every process. CRATEX points, cones and sticks come in for the finishing processes. Cones for polishing reamed holes. Sticks for engine turning the inside of the frames. I do use a buffer with a loose wheel and compound for mirror polishing my Damascus for a better etch after heat treating as well as to polish handle scales.
Depending on application and abrasive shape, what size (diameter) and grit type are mostly used by knifemakers?
- The most common for me are 36, 60, 80, 120, 240, 400, 600 and 1000 grits. 36 to rip the steels down to profile quickly. And then step up from there to remove the previous grind lines.
How did you learn about CRATEX products? Official website, forum/blog, recommended by another knife maker?
- I found you on the explore page on Instagram.
When did you start using CRATEX abrasives in your shop?
- You were the ONLY one that offered individual pieces. I had never used them before due to the fact that everyone made you purchase an entire kit. I didn’t want to invest into something like that if I wasn’t going to like it. You provided the opportunity for me to try it!
Why did you choose our products instead of some other manufacturer?
- As stated above. You were the only manufacture that I could find that offered smaller (individual) purchases.
What do you like the most?
- All the above! The quality is great. The material lasts. Pricing is awesome and the customer service is wonderful, Easy to talk to and turnaround times are great.
Is there anything we could do to make you a more satisfied customer? (product improvement/online store/website/other)
- I wouldn’t change a thing. For me it was a great experience.
Would you recommend CRATEX products to others, and if yes, how would the recommendation sound?
- Definitely!!! “Have you tried engine turning your parts? Check out the CRATEX website! You can order only the items you want to try for a great price and not be forced to buy full high dollar kits”
What would you Google to find a business like CRATEX online?
- I originally Googled looking for other sites but all wanted to sell me 50 pieces or more or full sets.
Do you have any questions for us?
- At the moment, I do not. So far you guys are great and love the products and support.
Use paper to design the blade’s shape. Hold it at 1:1 scale size for easy construction. The length of the blade is your choice. Large knives can be bulky and require a lot of steel.
Then, design the tang (a piece of the blade that attaches to the handle). The simplest technique is full tang. The tang will have the same thickness as the knife, and the handle is shaped by hooking a wood piece to each side with rivets.
Skip stainless steel, since it must be sub-zero tempered and doesn't produce the fine blade. 1/8" thick carbon steel (01) is a fantastic knife making steel for creating a blade because it’s easy for drenching.
Wood is the perfect material for making a handle. But, you can create a handle with kirinite, G10, and micarta, also. These materials are ideal for knife making since they're waterproof.
Trace blade onto the slab with a marker. It’ll be the guide for cutting the steel. Ensure to outline the tang correctly, because the blade and tang are connected in one piece.
You can use a hacksaw, an angle grinder with CRATEX coarse abrasive, large wheel , grinder, vise, bandsaw, and drill.
Take a hacksaw to cut a rectangle about the traced blade to separate it from the main slab. Use a stiffer hacksaw for thicker steel. Then, grind down the box to create the blade profile.
Put the rough-cut blade into a vise and grind away excess steel. Employ the grinder to finish the blade shape. Now, smoothly grind the edge into a slope with the rubber abrasive wheels . Make the slope on each side of the blade, and you'll get the desired blade edge.
Apply the same size drill bit as the rivets that you’re going to use. Put the holes in the tang. Sand the blade with finer grits of sandpaper. Sand out any scratches and all surfaces of the blade. It’ll increase its quality and shine.
Keep it heating until the steel becomes orange. Hit lightly it against magnet to see if it's hot enough When the steel attains the right temp, it loses magnetic properties. Once it doesn't stick, let it cool by air.
Rerun this 3 times. Then drench it in the oil bath. Be cautious since there will be fire, so you must be protected appropriately. Once the blade is solidified, it can break if dropped, so be careful.
Set oven at 800 °F. Lay the blade on the middle rack and cook it for 60 minutes. When the time is up, a heat process is finished. Sand the blade using finer grits of paper and polish the blade for extra gleam.
There are two components of a handle, one on each side. Cut and sand the parts synchronal to ensure that both sides are symmetrical.
Drill the holes for rivets. Put it in a vise and let it dry overnight. Place the rivets, leave about 0.125 inches and peen them using a ball-peen hammer and file them down. Finally, sand the handle.
Cut down the paper. A properly sharpened blade should easily slice the paper into ribbons.
When choosing the knife, you should pay special attention to the type of steel used in the blade. Alongside edge geometry and design, steel is a crucial factor that determines how a knife performs. Steel is a mix of iron and carbon that is often enriched with other elements to improve specific characteristics relying on the application.
All types of steel used for knife making must include these 10 core properties:
Productivity - The simplicity that provides machined, cold-formed, blanked, forged, extruded,
The best blade steel typically falls into the 3 types:
1095 Steel is the main form of carbon steel and the most frequently used in the making in tons of knives. It has 95% of carbon, which boosts steel hardness and minimize the amount of wear that a blade gets during a lifespan.
Even with the wear's decreasing induced by the high carbon's presence, this type of steel isn't as hardened as other sorts of iron thanks to the small amount of manganese. Although manganese causes steel hardening, in higher concentrations, it makes a more fragile blade.
Stainless steel is the typical knife-making steel and the best steel for resistant free knives. The benefit of using stainless steel is the inclusion of chromium and other alloys that increase corrosion resistance. Stainless steel knives are usually made from austenitic or martensitic stainless steel.
Austenitic grades like 316 (standard molybdenum-bearing) may also use for this purpose. Low carbon sorts of austenitic stainless steel, like 304L (extra-low carbon stainless steel), should be skipped when making knives, except corrosion resistance is more important than the blade life.
Carbon steel is excellent for knife making since it gives the blade hardness and strength required to hold up versus impact and wear. Still, Knives formed from carbon steel can be inclined to rust. It’s because carbon steel doesn’t have many alloying elements that protect against corrosion.
Standard carbon grades are C1045 (medium carbon steel), C1075 (high carbon steel), and C1090 (high-wear resistance carbon steel).
Categories such as 420 (high carbon steel with a minimum of 12% of chromium) and 440 (high carbon steel with the highest hardness) are typically used for knife making.
A knife is a tool with cutting edge and can use for different purposes such as hunting, combat, scouting, camping, hiking, and kitchen. It doesn't matter if you’ve found a knife in your old work box or unintentionally left your precious item outside, chances that your knife is pretty rusted are enormous. Rust may look like the sad end of the movie, but it’s possible to preserve your favorite knife using some of the methods below.
Once, you figure out how to remove rust, then you'll be capable of refreshing your knife look like a brand new. Here's a various range of techniques forremoving rust from blades.
Read this article carefully on how to remove rust off a knife with different methods and tools.
Choose an electric rotary tool, appropriate abrasives and a vice. For similar projects you can use Dremel hand rotary tool or bench lathe in combination with abrasive wheels.
Best abrasives for removing rust from knives are CRTAEX rubberized wheels. Wheels found their place in essential knifemaking tools for beginners. They are made from silicon carbide and premium rubber that is used for impregnation. Wheels come from 1 to 6 inch diameter. This means you can use them for small pocket knifes to big one with massive blade.
There are 4 grit sizes: coarse, medium, fine and extra fine. Start with medium grit to make sure not to damage knife. Fine and extra fine grits are perfect for final knife polishing.
Attach the small rubber abrasive wheel to Dremel. Pour oil to the rusted surface, for lubrication. Use rotary tool slowly and cautiously to avoid the blade damaging.
Set the knife in a vice grip, and use the small wheels with the short and precise movements. After that, replace medium or coarse rubber abrasive wheel with wheel in fine or extra fine grit size and continue with the same smooth short moves. Wipe the blade until it becomes shiny and polished.
This method is very efficient and gives instant results.
Be cautious and always use protective equipment when work with abrasives and rotary tools. Safety gloves, mask and eyeglasses are here to protect your body and lungs.
Vinegar is available in all stores and it’s also efficient product for cleaning metal and steel items, so purchase a big bottle if you need for the task. Make sure to choose white vinegar, that contains an organic compound known as acetic acid which will take off the rust. Other sorts of vinegar may cause stains.
If you don’t need to soak the entire knife, you can pour a paper towel in the liquid and envelop it around the rusted area. Allow the blade to sit in for 5 minutes. It can't sit longer since it will damage the item surface. After the soaking, clean down your knife using dry cloth.
This solution is suitable for a larger blade and a knife that won’t be applying for food preparation, because the spray can be toxic if it consumed. At the same time, that is the answer to the question: is rust on knife dangerous. Yes, using rusted knife can seriously jeopardize your health.
Still, using WD-40 it's a prompt and efficient solution of rust removal. Sprinkle the affected surfaces of the knife with spray and let it stay for couple of minutes. You’ll require to use fine sandpaper to tenderly remove the rust from the blade and get a knife without rust in several minutes. Simple as that.
If you don’t have it at home already, you can find baking soda in every grocery, and it can remove rust quickly and efficiently. Here're the instructions on how to remove rust from knives with baking soda. Use some water onto the surface you need to remove rust. Pour liberally an amount of baking soda onto the sprinkled surface. It should stick to the sprinkler parts.
Shake a bit, and the surplus will drop off. Sprinkle the scrubbing surface with some water and softly scrub the baking soda coated item. Now, when a considerable amount of soda has been dissolved, wet little more, if the blade has reamain rust. After, five minutes of cleaning, almost all rust disappears.
Onion is food that provides removing of rust naturally and solves your issue on how to remove rust from kitchen knives. If you pull the blade back and forth into an onion, the rust will disappear quickly. This vegetable contains the sulfenic acids that eliminate rust.
Potato is another vegetable that helps to take off the rust from your blade. Key ingredients that provide rust removal is the oxalic acid. Just, put your knife into the potato for a couple of hours. When you take it off, clean the surface with oil and rust should gone.
Lemon is one of the primary household supplies, and it's available in almost every kitchen. To start the process you’ll need a glass, lemon juice, and water.
Then, mix half of the hot water and half of the lemon juice in your glass, adequate to cover the metal blade, and submerge knife in. Leave it for 10 minutes. After ten minutes, take off your knife from the glass. The rust has disappeared, and you can wipe away the rusted surface with cloth. It is an excellent solution and answer on how does lemon juice remove rust from knives.
Take the used toothbrush to remove dirt and grease from your knife blade. Pour some glass washing detergent to the toothbrush and then apply it on the rusted surface. After you finish the process, wash away the soap, and dry the blade with a clean rag.
There is no need for any chemical usage with eraser sponge. Sprinkle it with a little water, and you can start with the scrubbing. Scrub the rust pits on your blade. Then, wash off the blade and dry it.
You can find non-toxic rust removal products in auto part stores and hardware. They are milder than the other acid-based chemical solutions that you can apply to remove rust. To use a non-toxic product, fill some of a remover into a bowl and submerge the blade in the solution.
Let it sit in the solution for a half hour. Then, pull it from a bowl and rinse off the excess product, clean the blade with a rag and dry.
Before you take off the rust, ensure that the blade is without dirt and oils. Hold your knife under some hot running water to remove it.
Run it patiently and slowly, to avoid any damaging of your knife. Apply regular water to remove rust spots. Prevent the water comes through the gaps between the blade and handle because it can make new rust stains. At the end of the action, dry your knife blade with a clean, soft cloth.
Coca-Cola contains phosphoric acid that interacts with iron oxide to dissolve rust, and it’s a good instant solution to remove rust from stainless steel knives. You need a small bowl, coke can and aluminum foil wad. Pour the coke in a bowl. Then dip foil in the coke, take the wet foil from the cola and start scrubbing away the rusty spots from your blade surface. Rinse the knife and dry.
Calcium Lime Rust (CLR) Remover is a commercial cleaner that removes calcium, lime, and rust from any metal surface. It's usually using for remove surface rust stains from sinks, glass, bathtubs, but it can be applied to remove rust from a knife too.
First, immerse your blade directly into a pot with a mixture of half hot water and half CLR cleaner for about two minutes. Then, take the knife from the pan and rinse it with the cold water. Clean it with the gloves and dry the blade.
Maybe, the worst attacker on the knife blade quality is rust. Despite the fact that the modern knives produced from high-quality materials, rust almost always find a way to your blade surface. Take care of blade to ensure that you don’t have issues with rust consistency.
Follow these tips on how to protect your knife from rust spots.
Templates are very handy in getting a design from a piece of paper onto a bar of steel. Knife patterns are also great for making knife designs repeatable. If you have a template made of a durable material, you can make many copies of that knife and with very tight tolerances.
There are several types of patterns and you can make them with lots of different materials. First, you need to do is make a rough idea of knife design. When making templates you definitely don't have to settle on anything super specific, before it goes on the steel you can always modify the profile of the template after you cut it and get kind of a more visual and textural feel.
In this guide for the beginners, you're going to learn how to use knife patterns and knife sheath templates to achieve wanted result.
If you’re making knives and want to make a bunch of the same model, you're going to keep a copy of it. The best way is to make knife templates to preserve your piece of art. Trace the next few tips on how to create knife templates with different materials. If you want free printable knife patterns, templates or any knife profiles in PDF or other suitable format visit Dcknives.Blogspot.
Start with a piece of paper and a pencil, ruler or some French curves and draw that design out on paper. Then scale that up or down by the copy machine till you get the size just right. At that point, it's time to make a pattern.
Stick paper to a piece of wood or plastic and then cut and drilled that out until you get a temporary pattern. This one would work for making a few knives, but it is not good solution for production type work, since the paper is flexible and less durable than steel.
You can repeat all this paper pattern making process with streel, and you can make Bowie knife patterns, Case knife patterns or Paracord knife handle patterns. Just, clamp and scribe that on a piece of steel and create a more permanent model.
Now, take some Dyke and just paint onto the steel. You could also use a marker to do the same sort of thing to darken it up. Then clamp it down, take a carbide scribe and scribe around the outside of the pattern, and that will make the outline. Take it over to the drill and drill into the steel. Drill in a tiny bit just to leave kind of an indentation where you’re going to drill the actual sized holes.
You can use 30 drill which is excellent for 8-inch thin material because it’s unlikely to use anything smaller than that.
You can even transfer the knife design template to the blade steel itself whether it's mild steel or high stainless carbon. It doesn't really matter.
Another way, take the actual cut out of the knife, whether it's just cut or design on CAD program or other drafting software. You can print that rough shape cut and use some spray adhesive to glue it directly onto the steel. The only consideration is if you plan to drip blade, as the steel will get pretty hot while profiling. You may want to put waterproofer over the top. And other products can be used like hairspray that might work, instead of Duke.
It’s a definitely good idea to make patterns especially if you want to repeat design. Mild steel stays pretty consistency as far as moisture is concerned. You could use wood, but if it gets some wet you can get into the trouble. Mild steel is very cheap, stable, sturdy and lasts a long time. And you can easily scribe around its dozens if not hundreds of times, without compromising and the material itself. Unlike plastic or wood.
If you have already made designs, you can keep them and go to the local hardware store and buy a piece of Plexiglass. Take the knife and clamp it to the Plexiglass and then take a scribe and scratch a line around it and cut it on either a wood cutting band or metal cutting band soil. Now drill the exact same holes in the templates. You can do with a Dremel rotary tool.
The sheath can make or break how the knife is carried and also the look of it. You don't want to just cut out of a piece the leather, fold it over and stitch it. You want to make a knife sheath template functional and esthetical at the same way. Follow these steps below and learn how to make a knife template and use that process to make the sheets however you want.
Place the knife out on cardboard piece and trace around the blade as much of the handle as you want to cover with sheath. The template isn’t symmetrical, as the back of the sheath has an extension that will be folded down and stitched in place to create a loop through which belt will be threaded. This doesn’t have to be ideal.
With a pair of scissors, do a rough cut to see how pattern looks when the knife is laid out.
Then fold the template in half along the line that will create the blade's back part of the sheath and trim the overlap, therefore the model is symmetrical.
Press the paper against the blade to see where it lies within the model.
Next, apply a little bit of adhesive tape to make the template the same 3D shape as your leather will be. It allows you to adjust now while it’s easier.
Then, trim back the template to even it out and give the handle a little more exposure. A little more trimming and you’ll be ready to cut out the actual sheath leather.
Cut the tape holding template together and flatten it out.
Place pattern onto the opposite side of leather and trace it. Since it's easier and sets up the belt loop, so the right side is facing forward. Ignore the belt loop section of the template and use it just as a guide to follow a long piece with a ruler to ensure it’s long enough and straight.
Cut leather using a rotary cutter but avoid cutting inside corners where the blade part of the sheath meets the belt loop, because you'll over-cut.
Wrap the knife with plenty of plastic wraps. Then use dishtowel, knife to be sheathed, a pan of hot tap water, and binder clips. Place the sheath part of leather in hot water for a few minutes. It’ll change color and bubble a little as the water seeps into the leather.
Then, put leather on the dishtowel and fold the towel over the leather and push down to dry and squeeze out the excess water. Lay the knife on leather and fold it over, forming it over the handle as you go. Using binder clips, clamp the leather in place and work the leather, so it forms naturally around the handle and blade. You can shape the leather with fingers, so it covers the handle. Set it aside to dry but check it every 5 minutes for the first half hour to be sure the leather is molding the way you want. When the leather becomes dry, remove the binder clips. A leather knife sheath pattern is ready for using.
Use the rotary cutter to cut the sheath to size by taking off the rough edges and trace the contour of the handle and blade. Then cut through 2 layers of leather that have been water-hardened so it'll need a little more pressure. Cut slowly and be careful.
After that, use a leather chisel, cut a low groove into the leather following the edge of the sheath stitch. Do this freehand or with a built-in guide chisel. Mark stitches in the groove using a tracing wheel. 6 holes by the inch are enough. If you don’t have a tracing wheel, run it freehand.
Then, put the sheath on a plastic cutting board and using stitching needle, create holes in the indentations that are made with tracing wheel. Use a small wooden hammer and tap stitching needle lightly. Once you have poked all holes, lift the top layer of the sheath, and do the same thing on the bottom, as stitching needle will create holes on the bottom layer too. If you don’t have a stitching needle, you can use an ice pick. Stitching needles work better since they make a small slot, not a hole.
When you reach the top of the sheath, flip it and run from the bottom. The goal is to make a stitch that won't mess up, and with the groove in the leather, the sew is protected and sits even or below the leather surface. Tie knots, then sew needle in and out the end holes a few times, finishing by sewing the needle through one layer of leather and then pull tight. Cut the lacing level with the stitch, and it will be hidden.
Now you have your own made leather knife sheath.
Making a knife handle requires some time, and you’ll need some basic materials, but in reality, it’s not that hard at all.
Wood is natural, warm to the touch, comfortable for holding, and durable material too. It’s everywhere and therefore is a perfect choice for making a knife handle.
Bond wood scales with solid double-sided tape, to feel and move like a single unit. This’s the most important part of the knife handle making since scales need to be stuck together.
Use a blank sheet of paper and draw a sketch of your knife handle design. Cut the paper using scissors to create a knife handle template. Place knife handle pattern on the scale and trace it with a pen. Rerun it with another scale.
Apply a thin marker and trace the original handle slabs.
With pattern traced out, cut wood with a hand saw. A hand saw is ideal since this is a slow and repetitive job.
Once you make the knife handle shape, smooth it, using a belt sander paper following the line.
After the shaping, mark and drill the holes for the bolts. Then, sand again the wood. Now, sand it with sandpaper to make an elegant look and feel between fingers.
Separate two wood scales and put bare knife cautiously.
With a little wood glue on the back of the scales, set them in place. Place them in a clamp and leave for a 24 hour.
Remove the handle from the clamp. Clean the handle with paste wax or other product if the wood will accept it. Use hardwood since it’s the best wood for knife handles.
G-10 is a laminate made from fiberglass cloth layers, and it’s amazingly strong material. So, unlike more traditional materials like wood, it won’t break, chip, crack, or scratch easily.
Keep track of the next few instructions on how to make a G-10 knife handle.
Draw the handle design on the paper. Apply paper with handle design on the scales, trace it, and mark with the black magic marker since G-10 won't absorb the ink.
Mark the holes you're going to drill on one side of the scales.
Drill the holes in one scale, pour a drop of epoxy on the flattened inside surface, and glue the scales together. It ensures the scales will stay perfectly matched up as drill holes and do the rough shaping.
Shape the front of the scales with the file while they’re attached by the light epoxy bond.
If the holes are drilled, and the rough shaping is finished, put the edge of the knife blade on the seam between the scales.
Follow the handle shape onto the material, cut to rough shape, and then glue it using epoxy to the inside of the scales. If the material is dried, clean up the edges and drill through to fit the existing pin holes. A hand drill is great since as the holes in the scales will lead the bit.
Handle is ready for mounting. For pins, utilize two simple brass bolts. The key is that you can use the pins to clamp the scales in place by adding a nut and putting it down after using epoxy.
Once the epoxy dries, take a file to clean the head of the bolt, the extra length of bolt body on the nut side, and pins will be completely level.
Clean knife handle and shape it to fit your hand. Do it slowly and double-check it until it feels as an extension of the hand. Work through sandpaper grits to get that final finish.