Sanding Glass – 7 Methods on How to Sand Glass
This article is part of CHAPTER 1 series.
For full article click here
The glass has been around for thousands of years, and it's actually everywhere. In the walls of skyscrapers, in the windows of the houses, in the windshields of cars and airplanes. You can find segments of glass in cookware, bottles, crystal, jars and many other products.
Naturally, broken glass is sometimes garbage and a jam-up and potentially dangerous because of its sharp edges. However, even as garbage, a various application of glass has a unique design that can be an ideal detail for house interior. By grinding down the sharp and damaged edges of broken glass piece, you can develop it into something smooth, just right for handling or transform into an excellent piece of homemade art.
Therefore, if you want to achieve sanding glass feel, you need the proper tools such as sandpaper, dremel, drill or torch.
Read this article carefully on how to sand glass with different tools and techniques.
There are numerous DIY projects you can use glass in, like creating Valentine's day glasses or storage jars. Still, in an attempt to repurpose a glass object or bottle, you'll have to sand out its broken, jagged edges. Fortunately, you can easily use either sandpaper, Dremel, drill, or even silicon carbide powder to sand glass edges easily.
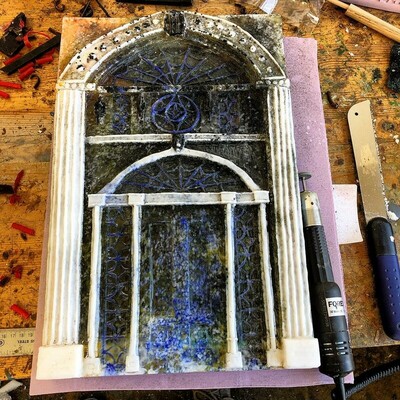
@wildbarnacleI use the medium, fine and extra fine points and wheels which give glass a near polished look. It can be the final near polish or pre polish if you’re going for a true polish look. Especially in places in which you aren’t able to really get to with a polishing wheel.
Dremel Glass Sanding
Dremel is a rotary tool that can be used to cut, sanding or polishing metal and glass. It's able to perform at very high speed, between 10,000 and 35,000 RPMs. It produces high-quality sanding look, but the key to a wanted result is in a firmly handling. Follow these steps below how to sand glass with a dremel.
Step #1 Inserting the CRATEX Tapered Point
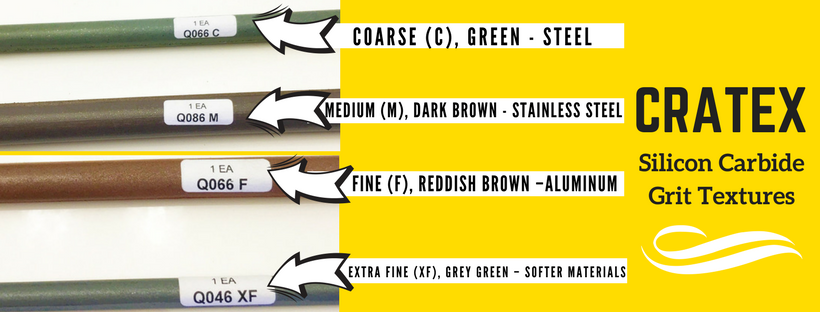
Unplug the rotary tool before mounting Rubber Abrasive Tapered Point required to sand a glass. You can also use CRATEX silicon carbide sanding disc for glass . They're easy to mount on conventional portable motor tools and can be used for sanding, deburring, smoothing and polishing glass or metal applications. Abrasives are made from premium silicon carbide and shaped as wheels, cones and points. Depending on glass type you can choose from 4 grits: coarse, medium, fine and extra fine. For smoothing glass edges it’s recommended to use fine or extra fine grit for final polish.
Step #2 Glass Handling
Be cautious when handling power tools. Wear protection glasses, a ventilation mask, and gloves. Hold glass object with one hand. Maybe, you can try putting it inside a vise, but it can potentially crack in a clamp. Apply this technique only if you can safely sand glass edges without contact with a tapered point.
Step #3 Start and Work
Start the dremel and keep the side edge of the point versus the glass edge. Work to the center and to the outside to get a rounded edge. Slowly rotate until you pass over the entire outside edge.
Step # 4 Finish
Finalize sanding of the glass with fine grit sandpaper versus the edge to have a better smother appearance.
Drill Method
A drill is (tool extended with a cutting or driving tool attachment) great solution for sanding. Work metode is very similar to Dremel sending. Read the following steps how to sand glass with a drill.
Step #1 Choose Right Bit
Use a sanding bit with a medium-grit sandpaper finish. Mount bit on a drill. Be cautious while using a drill. Wear gloves, dust mask, and protected glasses.
Step #2 Glass Manipulation
Hold glass application with one hand. You can try putting it inside a vise, but it can possibly break in a clamp. Only choose this option if you can harmlessly sand glass edges without touch with a bit.
Step #3 Process
Run the drill and hold the side edge of the bit against the glass edge. Run to the center and to the outside to make a rounded tip. Rotate until you have passed over the entire outside edge.
Step #4 Final Touch
Use fine grit sandpaper against the glass edge to make a uniform smoother finish.
Sanding of Glass with CRATEX Oblong Sticks
Oblong Sticks are rad hand tools for sanding, cleaning and polishing for glass and metal surface. Rubber Abrasive Oblong Stick is excellent for shaping glass pieces, too. Like other silicon carbide abrasives it is made in 4 grits; coarse, medium, fine and extra fine.
Track the following tips to get perfect sanding glass edges.
Tip #1 Use Oblong Stick
It's effortless to perform. Just, run the stick against the glass area that needs sanding. One of two swipes of the stick and edge will be smooth like satin. Since there is no wetting of the glass or the stick, you don't have to clean glass.
Tip #2 Use for Glass Shape
The stick can also be applied to make a smaller change in the shape of the glass. It's ideal to round out the edges or to dull a point that may fit better if it's slightly rounded. Here you can try coarse or medium grit size.
Tip #3 Change the Sticks
The more you work with sticks, the quicker it'll lose rough surface. You can use square sticks, or round sticks also depending on shape of glass workpiece. The only difference is in shape indeed. Performance of abrasives are the same for chosen grit.
Emery Cloth Technique
Buy a multipack of emery cloth (tape of dense fabric used to smooth metal or glass surfaces) in hardware. A multipack contains coarse to fine grit clothes, which can help in sanding the edges. Learn these steps below how to sand glass with emery cloth.
Step #1 Preparation
Envelop the coarse-grit emery cloth around a piece of wood to start. Use gloves to minimize contact with hands. Then, hold the glass with the other hand. Hold it firmly.
Step #2 Apply Emery Cloth
Run it up around the glass edge. Run for about 15 to 30 seconds on each inch, and then travel along the rest of the glass edge.
Step #3 Repeat the Action
Rerun with medium-grit emery cloth and then rerun with a fine-grit emery cloth.
Sanding of Glass Bottle with Sandpaper
Sandpaper or strong paper with sand stuck to one side is used for sanding a different surface. It's a great product for smoothing the glass edges. For sanding glass with sandpaper, you need an 80-grit wet and dry sandpaper, a pair of gloves, dust mask and protection glasses.
First Stage
The first you do is get wet the sandpaper and be sure there’s enough water on it during the sanding operation. It’ll keep most of the glass dust from getting into the air. With this action, the sandpaper is ready.
Second Stage
Begin sanding the glass. Apply a circular motion and be sure you use some downward pressure.
A slowly rotating the bottle will help the sanding be more even. Keeping the glass in one position the all-time will pressure one side of the glass. It’ll provide an uneven surface. Check the surface to see the progress. Wipe the glass edges off with a paper towel. You’ll see what parts are sanded and what part still require sanding.
Final Stage
If glass seems like it needs more sanding, sand it a few more minutes. If looks good, then sand down the inner and outer edges. Be cautious while doing this part and keep the sandpaper wet. At the end glass surface is flat, and the edges are no longer sharp.
Torch Method
A torch is a tool that is used to heat a metal, air, plastic or glass substance rapidly. For this method of sanding wine bottle glass, you need a glove, ventilation mask, and eye protection. This is advanced technique and it requires experience and skill. If you are not certain how to use torch, it’s better to leave it to a professional.
Be carefully and perform torching in large spaces or outside. Follow these steps on how to smooth glass edges with a torch.
Step #1 Be Cautious
You have to be a bit careful to heat a whole glass and not just the upper rim, so it doesn't break due to thermal stress.
Step #2 Get Start
Apply not so hard flame without much oxygen. Heat the whole glass and focus more on a rim and to only heat the rim. So, it's melting and smooths out. When you see the red-hot rim, it takes about a minute to 90 seconds till it gets a wanted cherry red appearance.
Step #3 Cool Down the Glass
After that, remove the torch, and let glass application to cool down. You only need 3 minutes per glass to smooth the edge and you got quickly the wanted result.
Sanding with Silicon Carbide Powder
Silicon carbide, known as carborundum is an important ceramic that is ideal for glass sanding among other things. For this method, you'll need silicon carbide powder jar, spray bottle and glass object with flat surface. Keep track of this next steps to get a smooth glass edge.
Step #1 Protect Yourself
Be careful and wear gloves, ventilation mask and protection glasses.
Step #2 Choose a Glass
Use a piece of window, picture or mirror glass. Put it on worktable over an old paper.
Step #3 Apply Silicone Carbide Powder
Spray it lightly to wet it down.
Step #4 Perform Sanding
Put the application with the sharp edge versus the window and sand. Hold it with another hand.
Step #5 Circling
Start circling the application around the glass, moving in slow motion. Be sure to stay in glass surface and apply light pressure on the piece of the glass.
Step #6 Check and Finish
After one minute, take the glass application and check the edge. If the edge is no longer sharp and it is smooth, you finished the sanding treatment.

